
Unlocking TradingView: Your Essential Toolkit for Sharper Market Analysis
Welcome, fellow traveler on the path to mastering financial markets. If you’ve found your way to TradingView, you’re already on a platform renowned for its powerful analytical capabilities. But like any sophisticated tool, its true power lies in knowing how to use it effectively. At the heart of technical analysis on TradingView are its indicators – dynamic tools that process historical data to offer insights into potential future price movements. Think of them as specialized lenses, each designed to highlight a different aspect of market behavior. They don’t predict the future with certainty, but they significantly enhance your ability to understand current conditions and make more informed trading decisions. In this comprehensive guide, we’ll embark together on a journey to explore some of the most impactful TradingView indicators, understand what they tell us, and learn how to weave them into a cohesive trading strategy. Ready to sharpen your edge?

What Exactly Are Technical Indicators and Why Should You Care?
Let’s start with the fundamentals. What are these “technical indicators” we speak of? Simply put, they are mathematical calculations based on past market data, primarily price and volume. They distill vast amounts of information into visual representations – lines, histograms, or bands overlaid on your price chart – making complex market dynamics easier to digest.
Why should you care? Because markets are inherently noisy and often driven by emotion. Indicators help you cut through the noise and apply a more objective, data-driven approach. They serve multiple critical functions:
- Identifying Trends: Are we heading up, down, or sideways? Indicators can help confirm the direction and strength of a trend.
- Measuring Momentum: How fast is the price moving, and is that speed increasing or decreasing? Momentum indicators signal the intensity of price change.
- Assessing Volatility: How wild are the price swings? Volatility indicators show you how much prices are fluctuating.
- Pinpointing Potential Entry/Exit Points: Based on historical patterns and current conditions, indicators can generate signals that suggest opportune moments to buy or sell.
- Confirming Price Action: Indicators can validate what the price chart itself is showing, adding confidence to your analysis.
| Function | Description |
|---|---|
| Identifying Trends | Indicators help confirm the trend direction. |
| Measuring Momentum | Signals the speed of price movements. |
| Assessing Volatility | Shows how much prices fluctuate. |
Imagine you’re navigating a ship through potentially turbulent waters. Price action is the waves you see directly. Indicators are your radar, depth sounder, and wind gauge – tools that give you a broader, deeper understanding of the environment, helping you anticipate conditions and steer your course more safely.
Navigating the Waters: Foundational Indicators for Trend and Momentum
Every trading journey needs a compass and a speedometer. In technical analysis, our compass for direction is often the trend, and our speedometer for speed is momentum. TradingView offers a robust suite of tools for this. Let’s dive into some of the most widely used and powerful ones.
Moving Averages (MA): Smoothing the Path
Think of a Moving Average as a way to smooth out price data over time, revealing the underlying trend by filtering out short-term fluctuations. It simply calculates the average price of an asset over a specified period (e.g., 50 days, 200 days) and plots that average as a line on your chart. As new price data comes in, the oldest data point is dropped, and the average “moves” forward.
There are two main types you’ll frequently encounter:
- Simple Moving Average (SMA): Calculates the average price equally over the period. It’s straightforward and widely used.
- Exponential Moving Average (EMA): Gives more weight to recent prices, making it react faster to new information than an SMA. This makes EMAs popular with traders looking for quicker signals.
| Type | Description | Reactivity |
|---|---|---|
| SMA | Average price over a set period. | Less reactive to recent changes. |
| EMA | Average that weighs recent prices more heavily. | More reactive to recent changes. |
How do you use them?
- Trend Identification: If the price is consistently above a long-term MA (like the 200-period MA), it suggests an uptrend. Below the MA, a downtrend. The slope of the MA also indicates the strength of the trend.
- Support and Resistance: Moving Averages can act as dynamic support or resistance levels. Price may bounce off a rising MA in an uptrend or be capped by a falling MA in a downtrend.
- Crossovers: A common strategy involves using two MAs (a shorter-term and a longer-term). When the shorter-term MA crosses above the longer-term MA (a “golden cross” or “bullish crossover”), it can signal a potential uptrend. When it crosses below (a “death cross” or “bearish crossover”), it may signal a downtrend.
Experiment with different periods (e.g., 10, 20, 50, 100, 200) depending on the time frame you trade. Shorter periods react faster but can generate more false signals; longer periods are slower but can filter out more noise.
Relative Strength Index (RSI): Measuring Momentum and Overbought/Oversold Conditions
The Relative Strength Index, developed by J. Welles Wilder Jr., is a momentum oscillator that measures the speed and change of price movements. It oscillates between 0 and 100 and is typically displayed in a separate window below the price chart. The standard setting for the RSI is 14 periods (often 14 days on a daily chart).
The core idea behind RSI is to measure the average gain during periods when the price increased and the average loss during periods when the price decreased, then compare these two values. The higher the RSI, the stronger the recent gains relative to losses, suggesting increasing buying momentum. The lower the RSI, the stronger the recent losses relative to gains, suggesting increasing selling momentum.
Key ways to use RSI:
- Overbought and Oversold Levels: The most common interpretation. An RSI reading above 70 is typically considered overbought, suggesting the price may be due for a pullback or reversal. An RSI reading below 30 is typically considered oversold, suggesting the price may be due for a bounce. *Caveat: In strong trends, RSI can remain in overbought or oversold territory for extended periods.*
- Divergence: This is a more advanced use but powerful. Divergence occurs when the price makes a new high (or low), but the RSI fails to make a corresponding new high (or low).
- Bearish Divergence: Price makes a higher high, but RSI makes a lower high. This can signal weakening upward momentum and a potential reversal downwards.
- Bullish Divergence: Price makes a lower low, but RSI makes a higher low. This can signal weakening downward momentum and a potential reversal upwards.
- Trend Confirmation: In a strong uptrend, RSI typically stays above 40 or 50. In a strong downtrend, it typically stays below 60 or 50.
| Application | Description |
|---|---|
| Overbought/Oversold | RSI above 70 indicates overbought; below 30 indicates oversold. |
| Divergence | Price and RSI move in opposite directions, signaling potential trend reversal. |
| Trend Confirmation | RSI confirms the strength of the current trend. |
RSI is a versatile tool, offering insights into momentum and potential turning points. Remember to use it in conjunction with other analysis.
Moving Average Convergence Divergence (MACD): The Relationship Between Two EMAs
Another cornerstone momentum indicator, the MACD, was created by Gerald Appel. It reveals the relationship between two Moving Averages (specifically, Exponential Moving Averages) and provides signals based on their convergence (moving closer) and divergence (moving farther apart). It’s typically calculated using three periods: a faster EMA (commonly 12 periods), a slower EMA (commonly 26 periods), and a signal line (commonly a 9-period EMA of the MACD line itself).
The MACD line is calculated by subtracting the 26-period EMA from the 12-period EMA. A signal line is then plotted, which is a 9-period EMA of the MACD line. Often, a histogram is also included, which represents the difference between the MACD line and the signal line.
How to interpret MACD:
- Crossovers: The primary signal source.
- Bullish Crossover: When the MACD line crosses above the signal line, it can indicate increasing bullish momentum and a buy signal.
- Bearish Crossover: When the MACD line crosses below the signal line, it can indicate increasing bearish momentum and a sell signal.
- Zero Line Crossovers: When the MACD line crosses above the zero line, it suggests the 12-period EMA is above the 26-period EMA, reinforcing bullish momentum. Crossing below the zero line suggests the opposite, reinforcing bearish momentum.
- Divergence: Similar to RSI, divergence between price and MACD can signal potential trend reversals.
- Bullish Divergence: Price makes a lower low, but MACD makes a higher low.
- Bearish Divergence: Price makes a higher high, but MACD makes a lower high.
- Histogram Analysis: The histogram grows taller as momentum strengthens in the direction of the MACD/signal line difference and shrinks as momentum weakens or reverses.
MACD is excellent for identifying changes in trend direction and momentum. It’s often used in combination with Moving Averages on the price chart itself.
Seeing the Full Picture: Volatility, Levels, and Volume Indicators
Understanding trend and momentum is vital, but markets also fluctuate in how much they move (volatility) and where key price battles are fought (support and resistance levels). Analyzing volume also tells us how much conviction is behind price movements. TradingView offers sophisticated tools to analyze these aspects.
Bollinger Bands: Gauging Volatility and Potential Reversals
Developed by John Bollinger, Bollinger Bands are a volatility indicator consisting of three lines: a middle band (typically a 20-period Simple Moving Average) and an upper and lower band plotted two standard deviations away from the middle band. Standard deviation is a measure of volatility, so the bands expand when the market is volatile and contract when it’s calm.
Key interpretations of Bollinger Bands:
- Volatility Measurement: Wide bands indicate high volatility, narrow bands indicate low volatility. Narrowing bands often precede a period of increased volatility (the “squeeze”).
- Price Extremes: Price often tends to stay within the bands. When price touches or breaks above the upper band, it can indicate an overbought condition or potential temporary top. When price touches or breaks below the lower band, it can indicate an oversold condition or potential temporary bottom. *Note: In strong trends, price can “walk” along the bands.*
- Trend Confirmation: During a strong uptrend, price will often hover near or ride along the upper band. During a strong downtrend, price will hover near or ride along the lower band.
- “W” and “M” Patterns: Specific price patterns relative to the bands can signal reversals. A “W” pattern near the lower band can signal a bullish reversal, while an “M” pattern near the upper band can signal a bearish reversal.
| Interpretation | Description |
|---|---|
| Volatility | Wide bands indicate high volatility. |
| Mid Band | Middle band acts as support or resistance. |
| Breakouts | Price breaking bands indicates potential reversals. |
Bollinger Bands are particularly useful in range-bound markets or for identifying potential turning points after periods of low volatility. They provide a visual representation of how far the current price is from its recent average, adjusted for market volatility.
Fibonacci Retracement: Identifying Potential Support and Resistance Levels
The Fibonacci Retracement tool is based on the sequence of numbers discovered by Leonardo Fibonacci. While the sequence itself is fascinating, in trading, we focus on the specific mathematical relationships between numbers in the sequence, particularly the ratios derived by dividing a number by the preceding number (approximately 1.618 – the Golden Ratio), by the number two places after it (approximately 0.618), and three places after it (approximately 0.382). Other key retracement levels often used are 0.236, 0.50, and 0.786.
How is it used? Traders apply the Fibonacci Retracement tool between two significant price points (usually a swing high and a swing low) to generate potential support and resistance levels where price might retrace to before continuing the original trend. For example, if an asset has been in a strong uptrend and starts pulling back, traders will look for potential support at the 38.2%, 50%, or 61.8% retracement levels.
Key applications:
- Potential Support/Resistance: The Fibonacci levels (23.6%, 38.2%, 50%, 61.8%, 78.6%) are watched by many traders as areas where price might pause or reverse.
- Entry/Exit Points: Traders might look to enter a trade at a Fibonacci support level during a pullback or exit a trade if price fails to break above a Fibonacci resistance level.
- Confirmation with Other Tools: Fibonacci levels become more significant when they align with other indicators (like a Moving Average) or chart patterns.
| Application | Description |
|---|---|
| Support/Resistance | Fibonacci levels indicate potential price reversals. |
| Trade Entry | Enter trades at retracement levels. |
| Confirmation | Use with other indicators for stronger signals. |
Fibonacci is less of an indicator that generates buy/sell signals on its own and more of a framework for identifying potential price levels to watch. Its effectiveness is often attributed to self-fulfilling prophecy, as so many traders use these levels.
If you’re looking to apply these technical tools across a variety of instruments, including Forex and CFDs, finding a platform with robust charting and execution capabilities is key. Moneta Markets is a platform worth considering. Hailing from Australia, it offers over 1000 financial instruments, suitable for both beginners and experienced traders.
Volume and VWAP (Volume-Weighted Average Price): Understanding Market Activity
Price tells you *where* the market is, but volume tells you *how much* activity is happening at that price. Analyzing volume is crucial for confirming the strength behind price moves. High volume on a breakout suggests conviction; low volume on a rally might signal weakness.
TradingView offers standard volume bars (showing total volume for a period) and more advanced tools:
- Volume Profile: This powerful tool (often displayed on the side of the chart) shows the total volume traded at each specific price level over a defined period. It highlights areas of high trading activity (“volume nodes”), which can act as significant support or resistance, and areas of low activity (“volume gaps”).
- Volume-Weighted Average Price (VWAP): VWAP is a trading benchmark used primarily by institutions. It’s the average price an asset has traded at throughout the day, based on both volume and price. It resets daily. VWAP is often viewed as a dynamic support or resistance level for intraday traders. Price above VWAP might indicate bullish intraday sentiment, while price below VWAP might indicate bearish sentiment.
Understanding volume, particularly through tools like Volume Profile and VWAP, gives you insight into where significant buying and selling pressure has occurred historically, adding another layer of depth to your analysis beyond just price movement.
Diving Deeper: Exploring TradingView’s Diverse Indicator Library
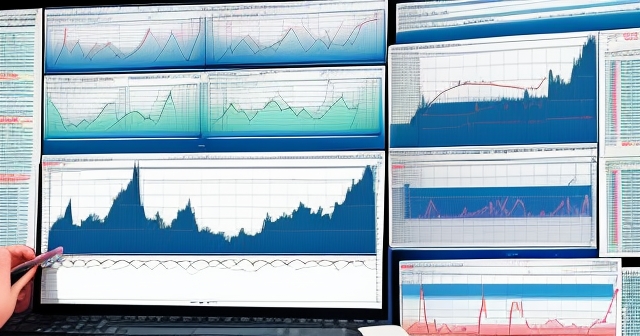
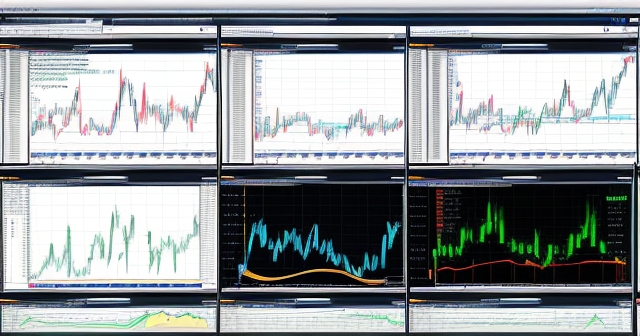
Beyond the foundational indicators, TradingView boasts a vast library of thousands of indicators, including many developed by the community using Pine Script, TradingView’s own programming language. This means you have access to a wealth of specialized tools designed for specific strategies or market conditions.
While we can’t cover them all, let’s briefly mention a few types or specific examples you might encounter:
- Specialized Oscillators: Tools like the Stochastic Oscillator (similar to RSI but uses a slightly different calculation) or the WaveTrend Oscillator (often used for identifying potential short-term turning points).
- Trend Strength Indicators: The Average Directional Index (ADX) measures the strength of a trend, rather than its direction.
- Custom Combinations/Strategies: Many community scripts combine multiple standard indicators or implement specific trading strategies (like scalping or swing trading setups) directly on the chart. Examples might include indicators for identifying potential order blocks, liquidity zones, or specific chart patterns. Some users create complex systems like the TDI (Traders Dynamic Index), which combines elements of RSI, Moving Averages, and volatility bands.
Exploring this library can uncover tools perfectly suited to your trading style or the instruments you trade. However, be mindful: more indicators don’t necessarily mean better results. Each indicator is based on a mathematical formula processing historical data; they are not crystal balls. It’s crucial to understand what an indicator is measuring and *why* it might be relevant to your analysis.
Using TradingView’s robust charting tools allows you to overlay and customize these indicators extensively. If you are exploring different brokers to apply your indicator-based strategies, particularly in markets like Forex, consider platforms that integrate well with sophisticated charting. In choosing a trading platform, the flexibility and technical advantages offered by Moneta Markets are noteworthy. It supports popular platforms such as MT4, MT5, and Pro Trader, combining high-speed execution with competitive spread settings for a quality trading experience.
The Synergy of Tools: Combining Indicators and Charting Techniques
Here’s a critical concept: rarely should you rely on a single indicator. Markets are complex, and no one mathematical formula can capture all nuances. The power comes from combining indicators to gain a more complete picture and, crucially, using them in conjunction with price action itself.
Think of indicators as members of a symphony. Each plays a different part, but the true beauty emerges when they play together in harmony. A buy signal from one indicator is more powerful if confirmed by another.
Strategies for combining indicators:
- Confirming Signals: Use a momentum indicator (like RSI or MACD) to confirm a trend signal from a Moving Average crossover. For example, a bullish MA crossover is more compelling if RSI is rising from oversold territory or MACD is showing a bullish crossover.
- Combining Different Types: Use a trend indicator, a momentum indicator, and a volatility indicator together. For example, identify a trend with MAs, look for a pullback entry signal from RSI reaching oversold levels, and use Bollinger Bands to gauge if the price move is extended.
- Aligning with Support/Resistance: Look for indicator signals that occur near key support or resistance levels identified by price action, Fibonacci, or Volume Profile. A bullish signal near a strong support level carries more weight.
Furthermore, TradingView isn’t just about indicators; it offers diverse charting methods that present price data in different ways:
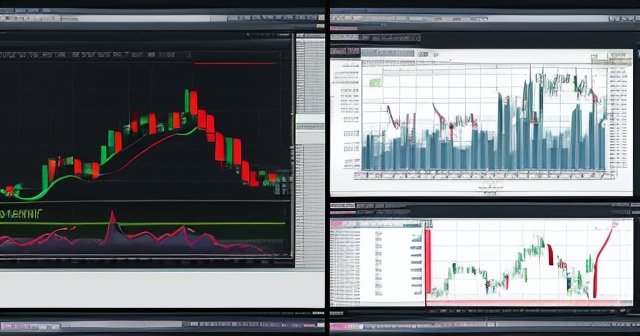
- Candlestick Charts: Show open, high, low, and close prices, with color indicating bullish/bearish movement. They are rich in information and form recognizable patterns (like engulfing patterns, doji, hammers) that can be used alongside indicators.
- Bar Charts: Similar to candlesticks but without the body color, showing vertical lines with horizontal marks for open/close.
- Line Charts: Simply connect closing prices, useful for visualizing overall trends without noise.
- Renko Charts, Kagi Charts, Line Break Charts: These alternative charts filter out time and focus purely on price changes, offering a cleaner view of trends and reversals, which can complement indicator analysis focused on price momentum.
Integrating indicator analysis with these charting techniques and patterns, along with identifying key levels (support/resistance, supply/demand zones), creates a more robust framework for decision-making. It’s about building a confluence of signals.
Avoiding the Pitfalls: Common Mistakes and What Indicators Can’t Do
While powerful, indicators are not foolproof. Many new traders fall into traps when using them. Understanding these pitfalls is as important as understanding the indicators themselves.
- Indicator Overload: Using too many indicators on your chart creates clutter and can lead to conflicting signals, causing confusion and indecision. Focus on a few indicators you understand well that complement each other.
- Lagging Nature: Most indicators are based on historical data, meaning they are inherently lagging. They confirm what *has happened* or *is happening*, not necessarily what *will happen*. They are best used to confirm trends and provide probabilistic signals, not definitive predictions.
- Ignoring Price Action: Indicators are derived *from* price. Price action is the primary information. Never rely solely on an indicator signal if it contradicts the overall price structure, trend, or key support/resistance levels. Price action should lead your analysis, with indicators providing confirmation.
- Curve Fitting: Optimizing indicator settings excessively on historical data to look perfect in the past. These optimized settings may not work in the future market environment. Use generally accepted or slightly adjusted periods, and test them on diverse market conditions.
- Not Adapting to Market Conditions: Some indicators work better in trending markets (like Moving Averages), while others are more useful in range-bound markets (like RSI or Stochastic). Using the wrong tool for the current market phase can lead to poor results.
- Neglecting Risk Management: Indicators provide signals for potential trades, but they do not manage your risk. Every trade idea, whether based on indicators or not, must be accompanied by a solid risk management plan, including stop-loss orders and appropriate position sizing.
Remember, indicators are tools to aid your analysis, not guarantees of profit. They filter data and highlight probabilities based on historical tendencies. Your success as a trader depends on understanding the market, applying tools correctly, managing risk, and maintaining discipline.
Crafting Your Trading Strategy: Integrating Indicators into a Cohesive Plan
Now that we’ve explored some key indicators, how do you pull it all together into a functional trading strategy? A trading strategy is more than just finding buy/sell signals; it’s a comprehensive plan that dictates how you approach the market.
Your strategy should answer questions like:
- What time frame will I trade on? (e.g., 15-minute, 1-hour, daily)
- What instruments will I trade? (e.g., specific Forex pairs, certain stocks, indices)
- What indicators or tools will I use? (e.g., 20 & 50 EMA, 14-period RSI, price action analysis)
- What specific conditions must be met for me to enter a trade? (Entry criteria)
- Where will I place my stop loss to limit potential losses? (Risk management)
- Where will I look to take profits? (Exit criteria)
- How much capital will I risk per trade? (Position sizing)
Using indicators fits into the entry and exit criteria sections. For example, a simple strategy might involve:
Strategy Idea (Example):
- Instrument: GBP/USD (Forex)
- Time Frame: 1-Hour Chart
- Indicators: 20-period EMA, 50-period EMA, 14-period RSI
- Entry Criteria (Long):
- Price is above both the 20 and 50 EMA (Uptrend Confirmation).
- The 20 EMA is above the 50 EMA (Momentum Confirmation).
- Price pulls back towards the 20 or 50 EMA and finds support.
- RSI is above 50 (Bullish Momentum Confirmation) and/or bouncing from the 40-50 zone.
- A bullish candlestick pattern forms at the support level.
- Stop Loss: Placed just below the support level (the EMA or recent swing low).
- Exit Criteria (Long):
- Price reaches a predetermined profit target (e.g., based on recent swing highs or a risk/reward ratio).
- A bearish signal appears (e.g., RSI becomes overbought > 70, price closes below the 20 EMA, bearish candlestick).
- The 20 EMA crosses back below the 50 EMA (Trend Reversal Signal).
This is a very basic example, but it illustrates how multiple criteria, including specific indicator readings and price action, combine to form a decision rule. The indicators provide objective criteria for triggering trades according to your plan.
Trading financial markets, whether Forex, stocks, or other instruments, involves inherent risk. While indicators provide valuable insights, they are tools for analysis, not guarantees of profit. It’s crucial to test your strategies (using historical data or simulated trading on platforms like TradingView’s Replay feature) before committing real capital. Moreover, partnering with a reliable broker is essential for executing your strategy effectively.
For those specifically active in global markets and seeking robust trading environments, finding a broker with strong regulatory backing and comprehensive services is paramount. If you are looking for a Forex broker with regulatory assurance and global trading capabilities, Moneta Markets stands out. It holds certifications from multiple regulators including FSCA, ASIC, and FSA, provides segregated client funds, offers free VPS, and 24/7 Chinese customer support, making it a preferred choice for many traders.
The Role of EEAT in Technical Analysis and Indicator Use
In the digital age, the credibility of information is paramount, especially when dealing with finance. This brings us to the concept of EEAT: Experience, Expertise, Authority, and Trustworthiness. How does this relate to using TradingView indicators?
- Experience: Gained through practice. The more you use indicators on live charts, observe how they behave in different market conditions, and test strategies, the more experienced you become. This experience allows you to better interpret nuances that aren’t explicitly defined in standard guides.
- Expertise: Comes from deep understanding. Don’t just apply an indicator; understand its calculation, its strengths, its weaknesses, and the market conditions it’s best suited for. Reading about the indicator’s creator or studying how professional traders use it builds expertise.
- Authority: Established through consistent, successful application and sharing knowledge. While not everyone needs to be a market guru, demonstrating a consistent approach and understanding *why* your strategy works (or doesn’t) contributes to your own authority over your trading decisions. TradingView’s platform even allows users to publish scripts and ideas, contributing to the collective authority of the community.
- Trustworthiness: Built on reliability and transparency. Be honest about the limitations of indicators and your own strategies. Trustworthy analysis acknowledges risk and doesn’t promise unrealistic returns. Relying on well-established, reputable indicators and understanding their history contributes to a trustworthy analytical process.
| EEAT Element | Description |
|---|---|
| Experience | Gaining practical knowledge through usage. |
| Expertise | Understanding the strengths and weaknesses of indicators. |
| Authority | Building trust through consistent analysis. |
| Trustworthiness | Providing honest, reliable insights. |
When you approach technical analysis on TradingView with an EEAT mindset – seeking experience, building expertise, developing your own authority through consistent practice, and relying on trustworthy methods – you elevate your trading from guesswork to a skilled discipline. TradingView provides the tools; your dedication to EEAT provides the foundation for successful application.
Beyond the Basics: Exploring Customization and Community Insights
TradingView is a dynamic platform, and its indicator ecosystem is constantly evolving. While mastering the core indicators is crucial, don’t hesitate to explore further.
- Customization: Most indicators on TradingView are highly customizable. You can change periods, colors, line styles, and often input specific parameters. Experimenting with settings can sometimes fine-tune an indicator for a specific asset or time frame, but remember the risk of curve fitting.
- Pine Script: For the more technically inclined, Pine Script allows you to write your own indicators and strategies or modify existing ones. This is where true customization happens, enabling you to translate unique trading ideas directly onto your charts.
- Community Scripts: The vast library of community-published scripts is a goldmine. Users share indicators based on various concepts – from simple tweaks of standard tools to complex, multi-indicator systems or unique visualizations like specific market structure overlays. You can browse by popularity, rating, or category. Always read the descriptions and comments for community scripts to understand their purpose and potential limitations.
- Published Ideas: TradingView is also a social platform where traders share analysis and trade ideas. Looking at how others use indicators and charting techniques can provide new perspectives, though always critically evaluate any shared ideas before incorporating them into your own trading.
Leveraging TradingView’s community features and customization options allows you to move beyond the standard toolkit and tailor your analytical setup to your specific needs and interests. Just ensure that any custom or community-based tool you use is thoroughly understood and tested.
Conclusion: Empowering Your Trading Journey with TradingView Indicators
We’ve journeyed through the world of technical indicators on TradingView, from the foundational concepts of trend and momentum with Moving Averages, RSI, and MACD, to the insights offered by Bollinger Bands, Fibonacci, and Volume Profile. We’ve seen how combining these tools, integrating them with diverse charting techniques, and applying them within a disciplined trading strategy can significantly enhance your market analysis.
TradingView’s indicators are more than just lines on a chart; they are powerful analytical tools that distil complex market data into actionable insights. By understanding what each indicator measures and how they can be used in concert, you gain a more objective perspective, helping you identify potential opportunities and manage risk more effectively.
Remember that mastery comes with practice and continuous learning. Test different indicators, experiment with combinations, and integrate them into a comprehensive trading plan that includes robust risk management. Markets are constantly changing, and your approach should evolve too.
By leveraging the depth and breadth of tools available on TradingView and committing to the principles of EEAT – building experience, gaining expertise, acting with authority in your decisions, and relying on trustworthy methods – you empower yourself to navigate the complexities of financial markets with greater confidence and skill. May your charts be clear and your decisions informed.
best tradingview indicatorsFAQ
Q:What is a technical indicator?
A:A technical indicator is a mathematical calculation based on past market data used to predict future price movements.
Q:How do I use multiple indicators together?
A:Combine different types of indicators (trend, momentum, volatility) to confirm signals and get a comprehensive view of the market.
Q:Can indicators guarantee profit?
A:No, indicators are tools to aid analysis; they do not guarantee profit and should be used with a solid risk management plan.
留言